How to Download, Install, and Activate Microsoft Project LTSC 2024 Professional Plus
Microsoft Project LTSC 2024 Professional Plus is the latest perpetual version of Project, designed for professionals and organizations that prefer a one-time-purchase project management tool. It includes full versions of the powerful Project desktop application — without the need for a Microsoft 365 subscription. Before you begin, please ensure your system meets the minimum requirements.
System Requirements for Installing Microsoft Project LTSC 2024 Professional on Windows
| Requirement | Details |
|---|---|
| Operating System | Windows 10 or Windows 11 (LTSC is not supported on Windows 8/7 or macOS) |
| Processor | 1.6 GHz or faster, dual-core (x64) |
| RAM | 4 GB or more |
| Disk Space | Minimum 4 GB of free space |
| Display | 1280 × 768 resolution |
| Internet | Broadband internet (20 Mbps recommended for download) |
| Graphics | DirectX 9 or later, with WDDM 2.0 driver (for GPU acceleration) |
Note: Project LTSC 2024 Professional is not available for macOS. Mac users can consider alternatives or cloud-based diagramming tools.
✅ What You Need
| Item | Description |
|---|---|
| Admin Privileges | Required to install Project via command prompt |
| Internet Connection | Required for downloading Project installation files |
| Office Deployment Tool | Free utility from Microsoft used to deploy and install Project |
| Basic Command Prompt Usage | You’ll be running a few simple commands during installation |
How to Uninstall the Previous Version of Microsoft Project
The Uninstallation Process for Windows Users
- Open the “Control Panel”.
- Select “Programs and Features”.
- Find Microsoft Project in the list, right-click, and select “Uninstall”.
- Follow the uninstallation wizard instructions.
Note: The process may take several minutes, depending on your computer’s configuration.
System Restart
After uninstallation, be sure to restart your computer. This will help complete the uninstallation process and prepare the system for installing the new version of Project.
How to Install Microsoft Project LTSC 2024 Professional on Windows
Step 1: Download the Office Deployment Tool (ODT)
What is it?
The Office Deployment Tool allows you to download and install Project using a custom setup file.
- Go to the Microsoft ODT Download Page
- Click Download.
- Create a new folder in your C: drive called Office2024Setup (e.g., C:\Office2024Setup).
- Then, run the downloaded file and select that folder as the destination when asked where to extract the files.
✅ You should see: setup.exe and sample XML files
❌ You may not see an EULA.txt file — that’s normal.
Step 2: Create a Configuration File
- Open Notepad
- Paste the following code:
<Configuration>
  <Add OfficeClientEdition="64" Channel="PerpetualVL2024">
    <Product ID="ProjectPro2024Volume" PIDKEY="XXXXX-XXXXX-XXXXX-XXXXX-XXXXX">
      <Language ID="en-us" />
    </Product>
  </Add>
  <RemoveMSI />
  <Display Level="None" AcceptEULA="TRUE" />
  <Property Name="AUTOACTIVATE" Value="1" />
</Configuration>
Replace the placeholder with your actual product key.
Then go to File > Save As:
- File name:
configuration.xml - Save as type:
All Files - Encoding:
UTF-8
⚠️ Note: Save this file in the newly created Office2024Setup folder.
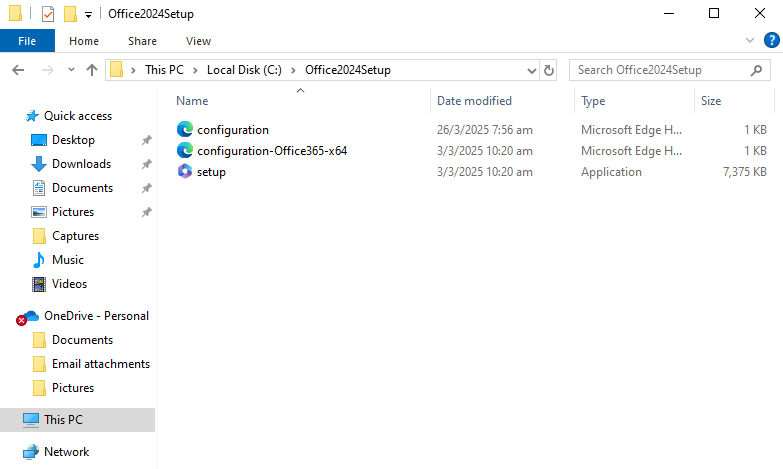
- Your Office2024Setup folder should now look like this:

Step 3: Install Project 2024
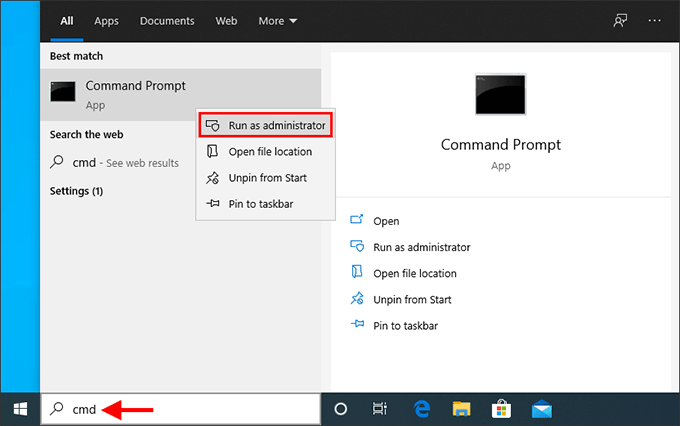
- Open Command Prompt as Administrator. To do this, right-click on it and select "Run as administrator" from the context menu, as shown below.
- In the Command Prompt window, run the command below to go to the folder where you saved the setup files:
cd C:\Office2024Setup
⚠️ Note: If you saved the setup files in a different folder, replace the path accordingly.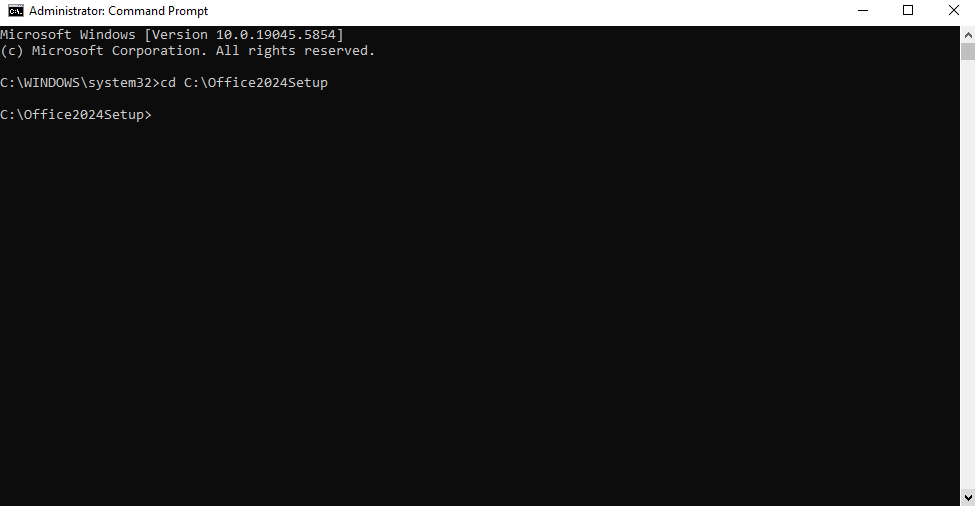
- Next, run the installer:
setup.exe /configure configuration.xml
⚠️ Note: This command must be run from inside the folder where bothsetup.exeandconfiguration.xmlare located.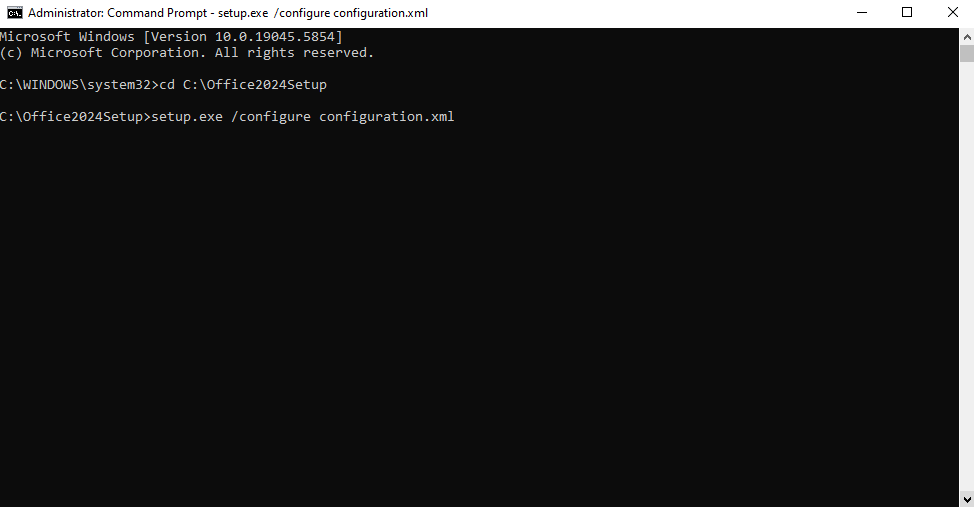


⚠️ Note: You won’t see a typical installer window. It may look like nothing is happening — but Project is downloading and installing silently in the background.
✅ Installation is complete when:
- The command prompt returns to a blinking cursor and when CMD prompt returns to showing 'C:/Office 2024 Setup' (or whatever folder you chose).
- Project appears in the Start Menu
- You can launch Project
Step 4: Activate by Telephone
- Open Project
- The Activation Wizard will launch
- Select “I want to activate the software by telephone” and click Next
- Choose your country/region and call the number provided
- Provide the Installation ID and get a Confirmation ID
- Enter the Confirmation ID and click Next
✅ Project will now be fully activated and functional. No Microsoft account required.
Summary
| Step | Action |
|---|---|
| 1 | Download and extract the Office Deployment Tool |
| 2 | Create a custom configuration.xml file |
| 3 | Run setup.exe /configure configuration.xml via Command Prompt |
| 4 | Activate Project by telephone |
Troubleshooting Installation & Activation Issues
If you encounter errors during installation or activation, please refer to the following common issues and their solutions:
1. “Couldn't install. We couldn't find the specified configuration file. Check the file path and file name.”

Cause: This error usually occurs if Command Prompt wasn’t run as Administrator or if the folder path was entered incorrectly.
Solution:
- Ensure you open Command Prompt as Administrator.
- Verify the folder name and path — for example, if your setup files are in
C:\Office2024Setup, the first command should be:cd C:\Office2024Setup - Make sure both
setup.exeandconfiguration.xmlexist in the same folder.
2. “Couldn't install. We're sorry, we had a problem installing your Microsoft 365 and Office program(s).”

or “We can't install. To install this product, first uninstall the following product(s) and try again.”

Cause: Remnants of previous Office editions or OneNote may still be present, preventing the LTSC 2024 installation from proceeding.
Solution: Perform a clean removal and reinstallation:
- Use the built-in Microsoft Get Help app:
Press Windows + S, type Get Help, and open the app.
In the search box, type Uninstall Office and follow the guided steps to fully remove previous Office installations. - If prompted, restart your PC when the process completes.
- Delete residual Office folders manually (after restart):
C:\Program Files\Microsoft OfficeC:\Program Files (x86)\Microsoft OfficeC:\ProgramData\Microsoft\Office
- Check for remaining Microsoft 365 Apps or OneNote installations:
- Go to Settings → Apps → Installed Apps (or Control Panel → Programs and Features).
- If you see any entries for Microsoft 365 Apps or OneNote, uninstall them — they can automatically reinstall older components.
- Restart your PC again, then proceed with a fresh Office LTSC 2024 installation.


Frequently Asked Questions
1. Can I use a Microsoft account to activate Project LTSC 2024 Professional Plus?
No. This version uses volume activation and does not support Microsoft account activation.
2. Is this a lifetime version?
Yes. It’s a one-time purchase that doesn’t expire, tied to a single device.
3. Is this available for Mac?
No. Project LTSC 2024 is only compatible with Windows 10 and 11.
4. What does LTSC mean?
LTSC stands for Long-Term Servicing Channel — a stable version with no feature updates, only security fixes.
5. What if I change my computer hardware?
Major changes may require reactivation by phone. Some hardware changes could invalidate the activation.
6. Can I install it on more than one PC?
No. Each product key is valid for one device unless otherwise stated.
7. Do I need internet access after installation?
Only for downloading and activating. You can use Project offline afterward.