In the digital age, screenshots have become an essential tool for communication and documentation. Knowing how to take a screenshot on Windows 11 can significantly enhance your productivity.
Windows 11, Microsoft's latest operating system, offers multiple ways to capture screenshots. These methods range from simple keyboard shortcuts to advanced built-in tools, catering to a variety of screenshot needs.
This article aims to provide a comprehensive guide on how to take a screenshot on Windows 11. It will walk you through the different methods available, offering step-by-step instructions for each.
At the end of this guide, you'll be equipped with the knowledge to capture, edit, and manage screenshots effectively. This will not only save you time but also make your work more efficient.
So, let's dive in and explore the world of print screen Windows 11.
Understanding Screenshots in Windows 11
Screenshots in Windows 11 serve multiple roles across various fields. They capture visual data quickly, which is essential for documentation and communication. Screenshots also help illustrate steps in guides, making them indispensable for IT professionals.
Windows 11 provides several options for capturing your screen. You can take full-screen captures or focus on specific areas, offering flexibility for different tasks. Whether through simple keystrokes or built-in tools, each method is geared towards ease of use.
Some users prefer keyboard shortcuts like Print Screen, while others rely on more advanced tools like Snip & Sketch. Each method has its advantages, from speed to customization, allowing users to choose the best fit.
Exploring these features will enable you to streamline processes and save time. By mastering these techniques, you can boost productivity and better support your workflows cost-effectively.
The Importance of Screenshots for IT Professionals
Screenshots are vital for IT professionals. They bridge technical issues and solutions, allowing support teams to communicate problems or procedures efficiently and visually.
Moreover, they aid in creating thorough documentation, enhancing clarity and understanding. Accurate screenshots help ensure that IT support and instructions are comprehensive and easy to follow.
Different Screenshot Needs and Methods
Different tasks require different screenshot techniques. Some situations call for full-screen grabs, while others need focused screenshots of particular windows. Windows 11 accommodates various needs with its diverse screenshot methods.
The correct method can make a big difference, from capturing error messages to demonstrating processes. These options enable IT professionals to choose the most effective approach for every scenario.
Basic Screenshot Techniques
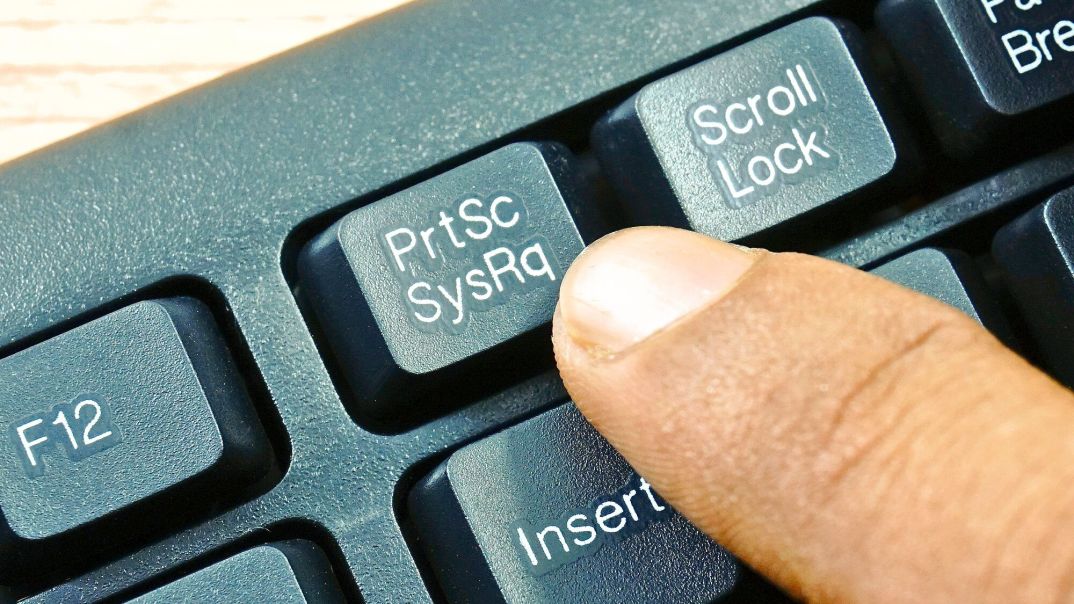
The Print Screen key, commonly labeled as "PrtScn," is your quick-access key for capturing the screen. It's a staple on most keyboards and offers a straightforward way to take screenshots. Although basic, it effectively captures the entire screen in one click.
To use the PrtScn button effectively, remember these simple steps:
- Press the "PrtScn" key on your keyboard.
- Open an image editing tool like Paint or Photoshop.
- Paste the screenshot using "Ctrl + V" and save it as needed.
As fundamental as it may seem, the Print Screen method is versatile. It's beneficial for immediate screen captures without navigating additional menus. Understanding this basic technique allows you to document on-screen content easily, feeling resourceful and efficient.
Windows + Print Screen Shortcut
The Windows + Print Screen shortcut enhances the traditional method. It saves time by automatically storing your screenshot as a file. No additional pasting is needed, making it a hassle-free choice.
To capture and save your screen:
- Press "Windows + PrtScn" simultaneously.
- Your screen will dim briefly, indicating the capture.
- The file is saved in the "Screenshots" folder within "Pictures."
This method stands out due to its immediacy and organization. Skipping the need for an image editor caters to those seeking an efficient, seamless screenshot process. Organizing screenshots becomes easier, enhancing productivity for IT pros and businesses alike and making you feel productive and organized.
Alt + Print Screen for Active Window Capture
Focus is key when targeting specific windows for screenshots. The Alt + Print Screen shortcut is designed just for this, capturing only the active window. This is ideal for documenting specific content without extra clutter.
To capture your active window:
- Make sure the desired window is active.
- Press "Alt + PrtScn" together.
- Open your preferred editor and paste using "Ctrl + V".
This focused approach is beneficial for reporting errors or sharing detailed steps within specific applications. By narrowing your capture, you reduce the need for extensive cropping, saving time and effort in post-processing and making you feel precise and effective.
Advanced Screenshot Tools in Windows 11
Snipping Tool: A Step-by-Step Guide
The Snipping Tool is a built-in application that offers more precision than basic shortcuts. It allows you to select specific areas, making it ideal for targeted screenshots.
To use the Snipping Tool:
- Search for "Snipping Tool" in the Start menu.
- Click "Mode" to choose from options like free-form, rectangular, window, or full-screen snip.
- Click "New" and select the area you want to capture.
It's straightforward and user-friendly, perfect for users wanting more control. This tool's flexibility lets you focus on essential parts of your screen. You can create clear, concise images essential for documentation or sharing by honing in on details.
Snip & Sketch: Enhanced Features
Snip & Sketch, an upgraded snipping tool, offers even more features. It combines capture functions with editing tools for dynamic screenshot creation.
To begin with Snip & Sketch:
- Use "Windows + Shift + S" to open the overlay.
- Choose the type of snip you want: rectangular, freeform, window, or full screen.
- The captured snippet opens in Snip & Sketch and is ready for editing or annotating.
This tool excels in integrating capturing and editing. You can add text, highlight areas, or doodle directly on the screenshot with annotation capabilities. Such features ensure that you can deliver concise information visually, enhancing team communication.
Game Bar: Capturing While Gaming
The Game Bar is a tool for gamers or users of full-screen applications. It allows users to capture moments without interrupting gameplay.
Here's how to use the Game Bar for screenshots:
- Press "Windows + G" to open the Game Bar overlay.
- Click on the camera icon or press "Windows + Alt + PrtScn" to take a screenshot.
- Screenshots are saved automatically in the "Captures" folder.
Designed for seamless interaction, the Game Bar ensures that users capture quality images even while gaming. Its design promotes efficiency without sacrificing engagement in the current task. It's an indispensable feature for effortlessly capturing real-time scenarios for gamers or app testers.
Managing and Editing Your Screenshots
Locating and Organizing Screenshots
Efficient screenshot management begins with knowing where Windows 11 saves screenshots. Screenshots taken with the PrtScn button combined with the Windows key are usually saved in the "Screenshots" folder, which resides within the "Pictures" directory.
Organizing your screenshots is crucial for easy retrieval later. Consider implementing a file-naming convention that includes relevant dates or descriptions. These practices streamline searching and ensure swift access during projects or presentations.
Editing and Annotating with Built-in Tools
Windows 11 comes equipped with practical editing tools for your screenshots. The Photos app allows for simple cropping, adjustments, and filters. For annotation, Snip & Sketch offers more detailed options.
Through Snip & Sketch, you can draw on, highlight, or even crop your images further. These tools enable quick refinements directly within the operating system. For more extensive edits, built-in options provide a solid foundation for most needs.
Troubleshooting Common Screenshot Issues
Problems with taking screenshots on Windows 11 often arise from simple missteps. Make sure your keyboard shortcuts are correctly configured. Keyboard issues or incorrect shortcut usage can hinder the screenshot process.
Another common issue is related to software conflicts, particularly with third-party tools. If problems persist, try temporarily disabling extensions or tool overlays. Updating your system and checking for driver compatibility can also resolve many issues. Regular system maintenance ensures smooth screenshot functionality.
Best Practices and Tips for Efficient Screenshotting
When used skillfully, screenshots can boost productivity. To ensure efficiency, familiarize yourself with keyboard shortcuts. This minimizes the time spent navigating menus and enhances workflow speed.
Prioritizing organization is also crucial. Consistently name and store screenshots in designated folders for easy retrieval later. This simple practice saves valuable time when references are needed quickly.
Remember, annotation enhances communication. Highlighting or adding notes can make information more straightforward for others. Here’s a quick list of best practices for effective screenshot management:
- Use keyboard shortcuts often for faster capturing.
- Regularly organize files in designated directories.
- Annotate screenshots to emphasize key information.
Exploring various methods and finding what works best for you can enhance efficiency. Customize your workflow and adapt your techniques to suit specific needs. Staying flexible and open to new tools ensures you leverage the full potential of screenshots in your professional tasks.
Conclusion: Enhancing Productivity with Effective Screenshot Strategies
Screenshots are potent tools for enhancing productivity in both personal and business settings. Familiarity with the proper methods can transform how you document and communicate. Harnessing the diverse screenshot options in Windows 11 allows you to tailor your approach to varied scenarios.
Adopting a strategy that combines keyboard shortcuts, organizational habits, and creative annotation will elevate your workflow. You can maximize efficiency and productivity in your tasks by continually refining your techniques and exploring new tools. Embrace the potential of screenshots as invaluable aids in your professional endeavors.
FAQ About How to take screenshot on Windows 11?
How do I find my saved screenshots?
Screenshots saved using the Windows + Print Screen shortcut are in the 'Screenshots' folder under 'Pictures.' For Snip & Sketch captures, check the clipboard or save them manually.
Can I edit my screenshots immediately after capture?
Yes, Snip & Sketch allows you to annotate screenshots right after capturing them. You can add text, highlights, or drawings for clarity.
What should I do if my Print Screen function isn't working?
Ensure that your keyboard shortcuts are enabled. Check your hardware connections or update your keyboard drivers as necessary.


